1 How to Install the SSH Client on Windows 102 How to Use SSH Commands in Windows 103 How to Open a Port in Firewall or Enable the Telnet Client
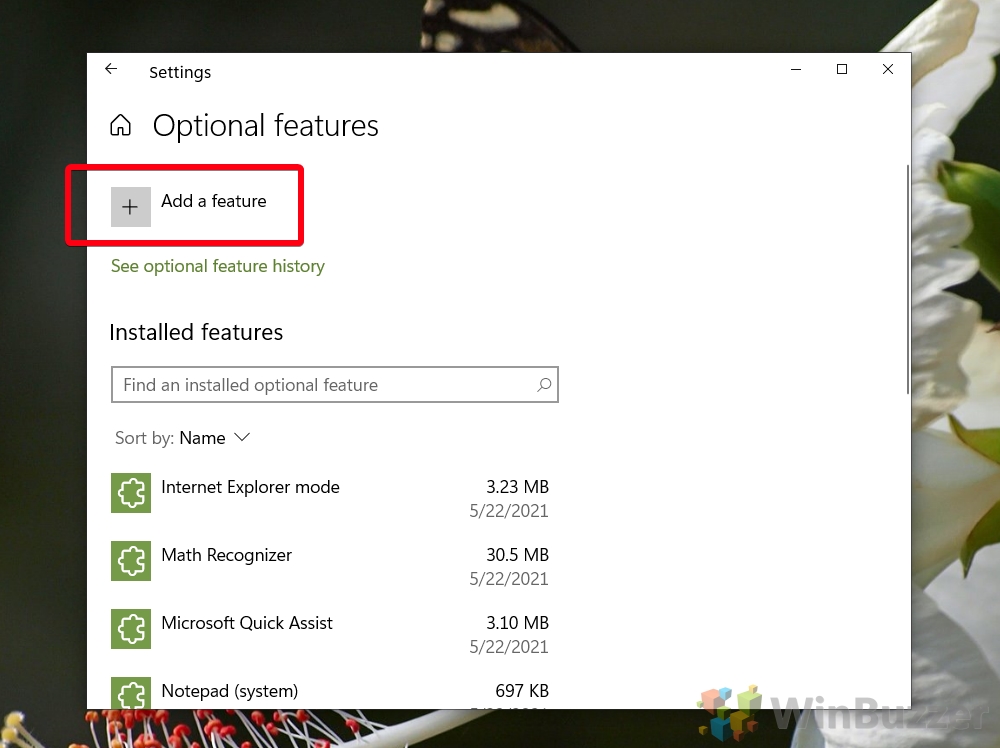
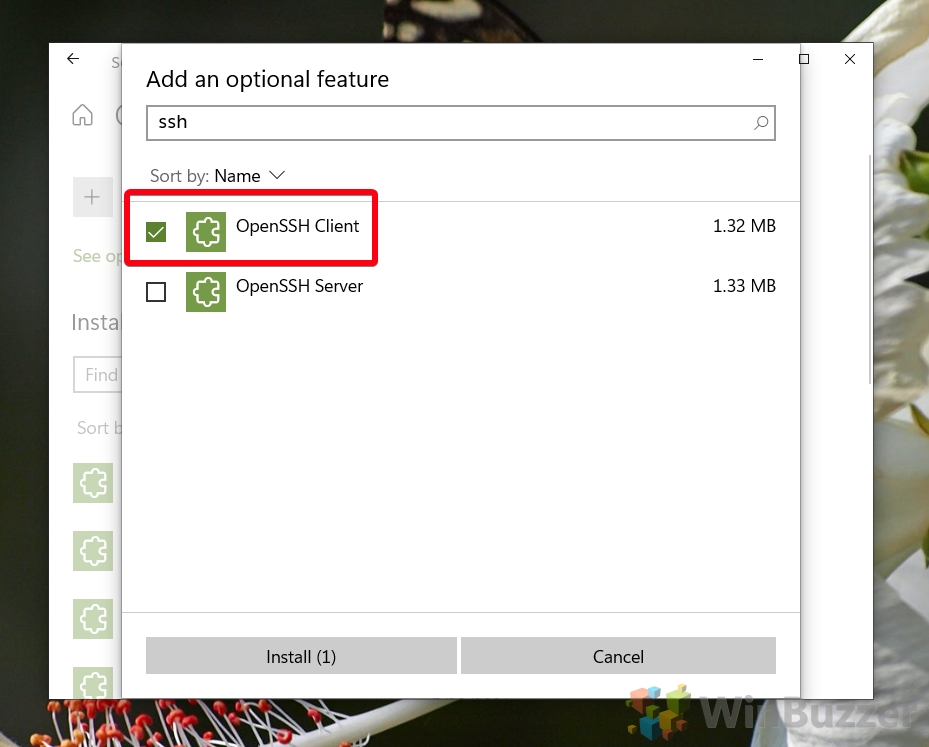
If you’re unfamiliar with SSH, it stands for Secure Shell, a protocol typically used for connecting to Linux servers. The command-line SSH tool lets you log into your server and run commands remotely to perform any required task. The Integrated OpenSSH for Windows Client The OpenSSH client for Windows is installed by default on Windows Server 2019 and Windows 10 build 1809 and later. However, if SSH commands aren’t working for you, it’s because you need to enable them in your Windows features. We’re going to walk you through enabling SSH on Windows 10 via this method, then show you how to use it. Let’s get started:
How to Install the SSH Client on Windows 10
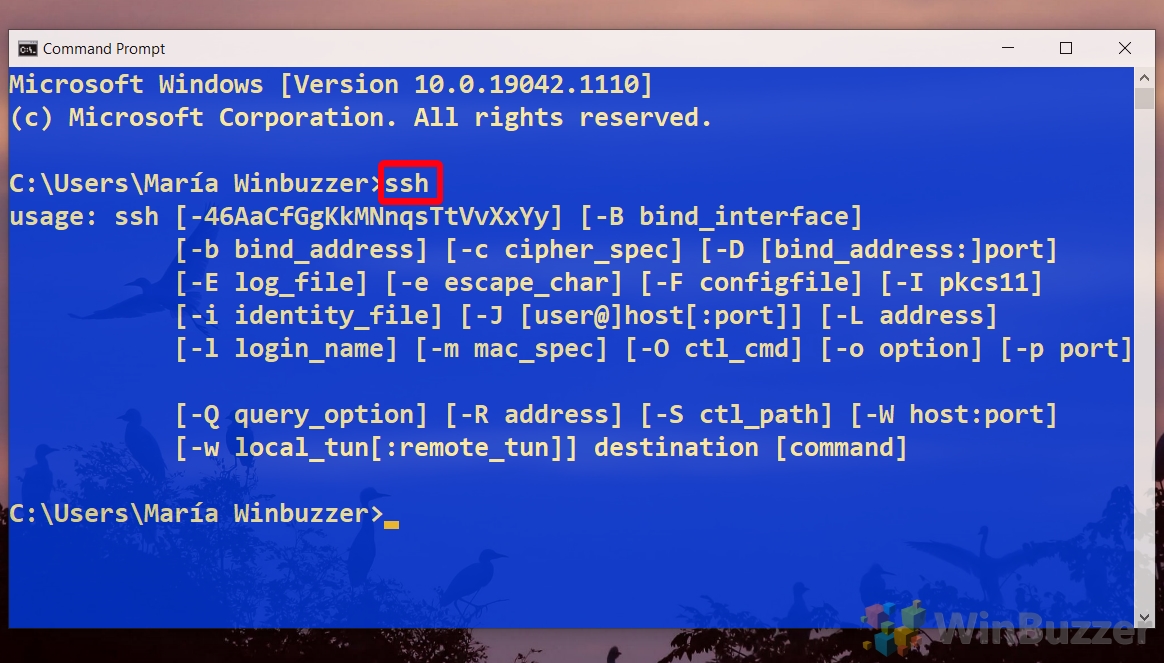
How to Use SSH Commands in Windows 10
How to Open a Port in Firewall or Enable the Telnet Client
Now you know how to install SSH on Windows. However, if you’re still having issues, you may need to follow our tutorial on how to open or close a port in Windows 10 Firewall to add an exception for your SSH port.
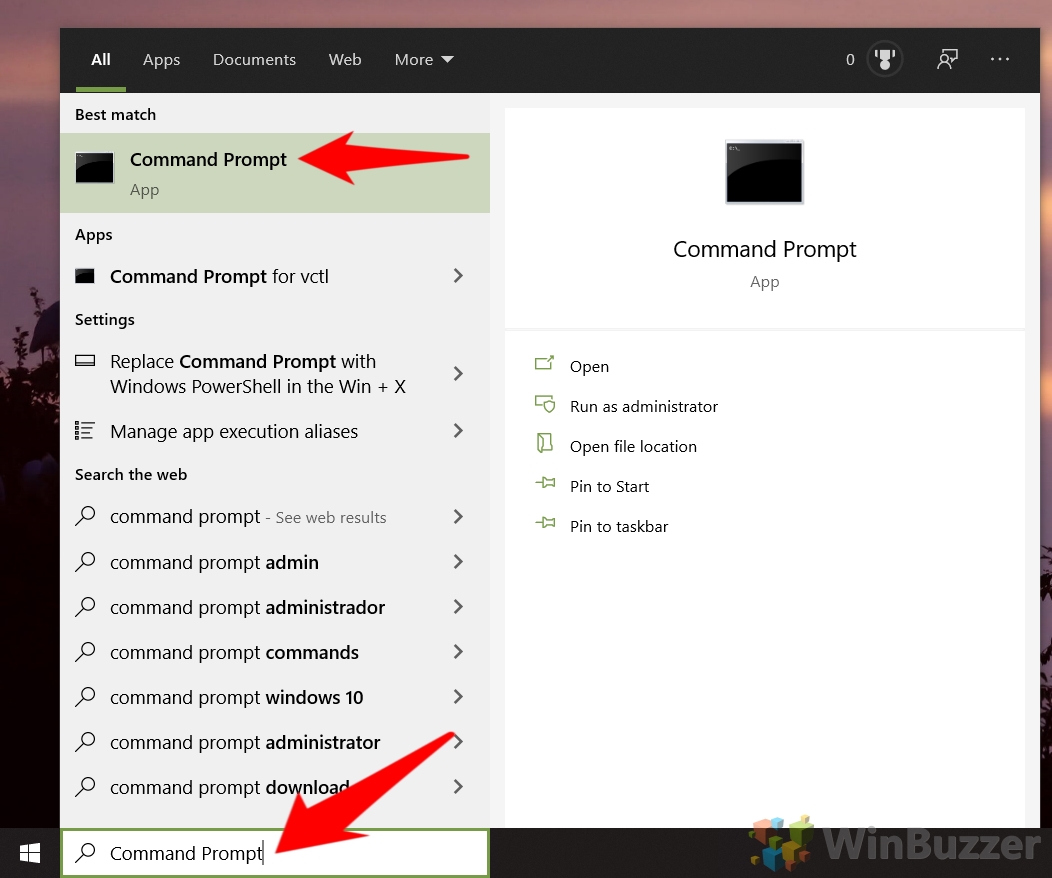
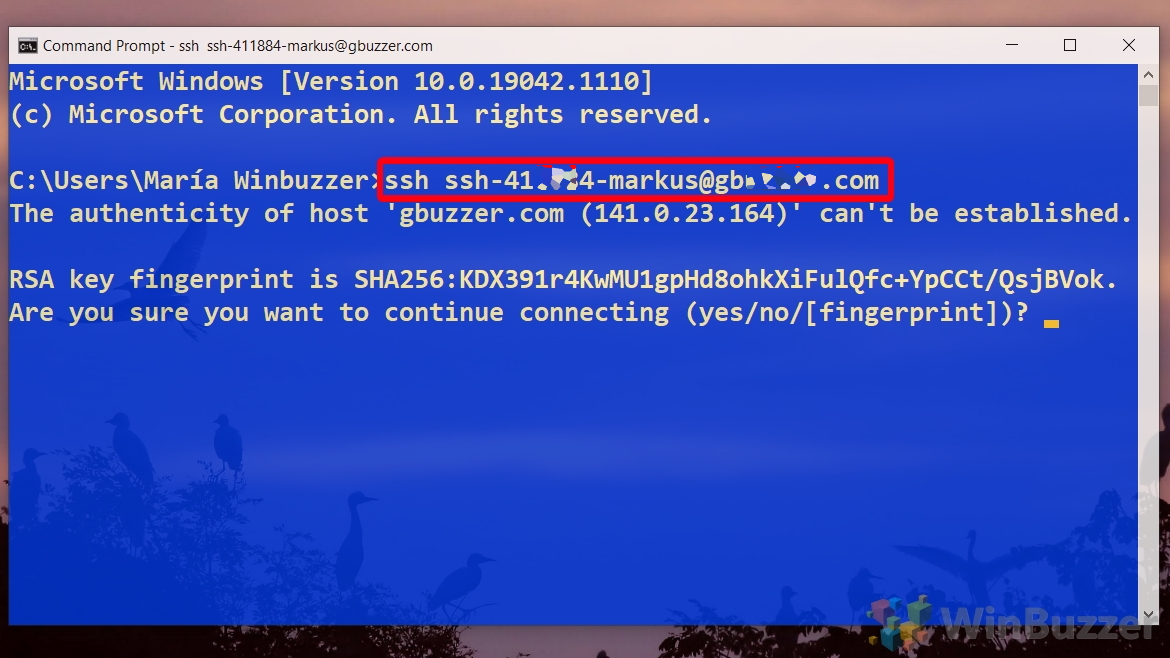
You’ll be prompted for your server’s root password, which you can type and press Enter to log in. If your server uses a different port to the standard for SSH, you can specify it by adding -p portnumber to the end of your command. The first time you connect to a server, you’ll receive a warning asking if you’re sure you want to connect. Type yes and press Enter to connect.
Finally, if your server uses the older Telnet protocol, you may want to follow our tutorial on how to enable the Telnet client in Windows 10 instead.
