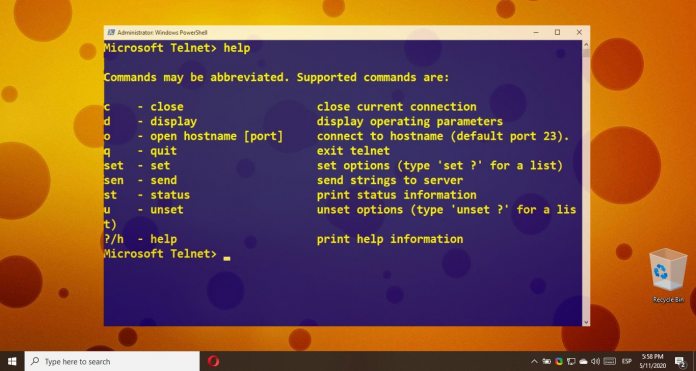
Those to trying to run Telnet without it enabled will face errors such as “Telnet is not recognized as an internal or external command” and “CreateProcess ‘telnet’ is not recognized (C++)”. What is Telnet? At its core, Telnet, or “teletype network” is a communications protocol developed in 1969. It lets users connect to a remote device or host remotely via a Telnet client to manage files other functions as if they were a regular user. The default telnet port is typically 23. As you can image, Telnet can be quite useful, letting users remotely run programs, check emails and weather, or even run simple games if they wish. In recent times, though, Telnet has been largely replaced by SSH (Secure Shell) due to its complete lack of encryption. Everything you do over Telnet is transmitted in plaintext, meaning someone snooping on the network can steal account information and other private communications. This wasn’t too scary in 1969, but now there are billions of people on the internet who can hack you. This is a big reason why Telnet is disabled in Windows 10 by default, but it still has its uses. Some very old, legacy equipment only accepts Telnet, especially in the scientific field. It also has a small nostalgia-driven enthusiast community and is used by amateur radio operators. Now that you know what Telnet is and its inherent risks, we can move onto how to enable the Telnet Client in Windows 10.
Windows 10: How to Enable Telnet
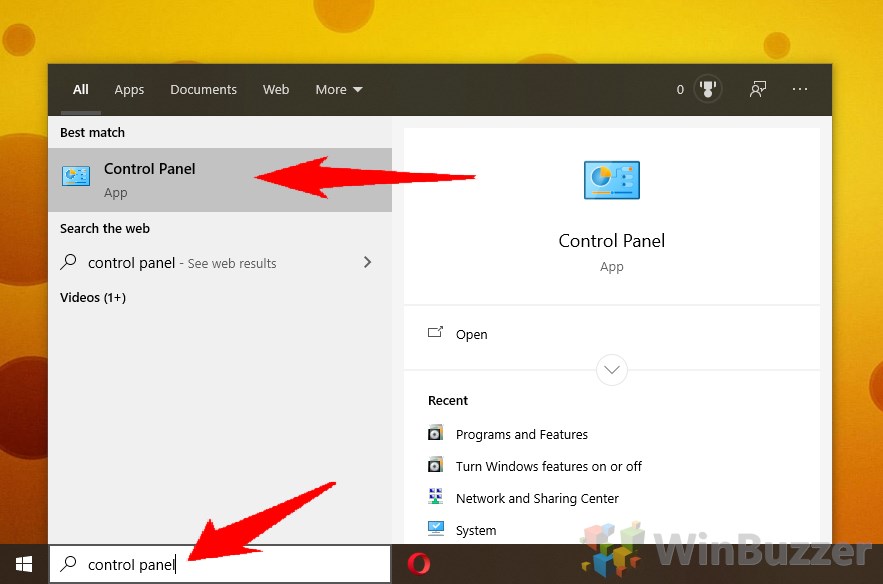
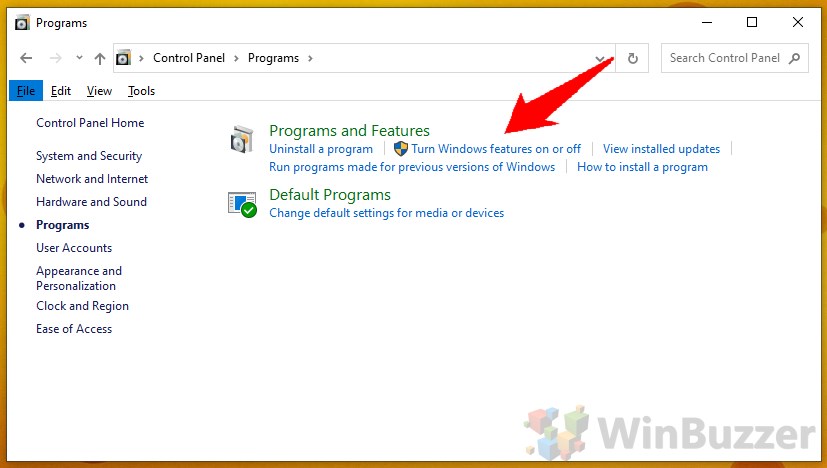
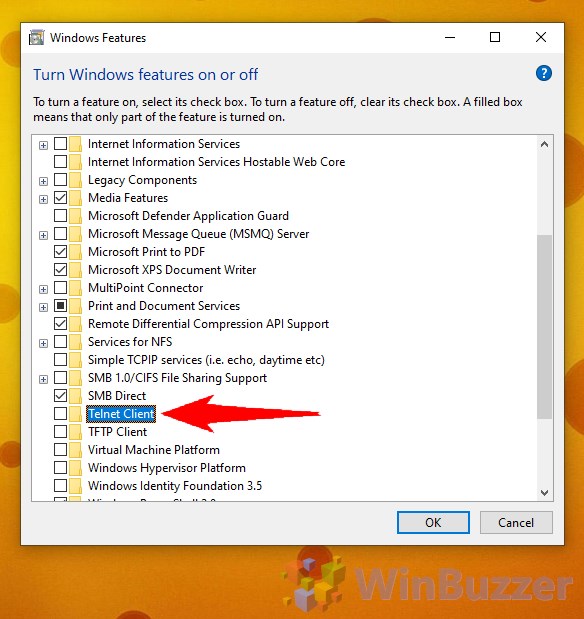
The most user-friendly route to enable the Telnet client in Windows 10 is via the Control Panel.